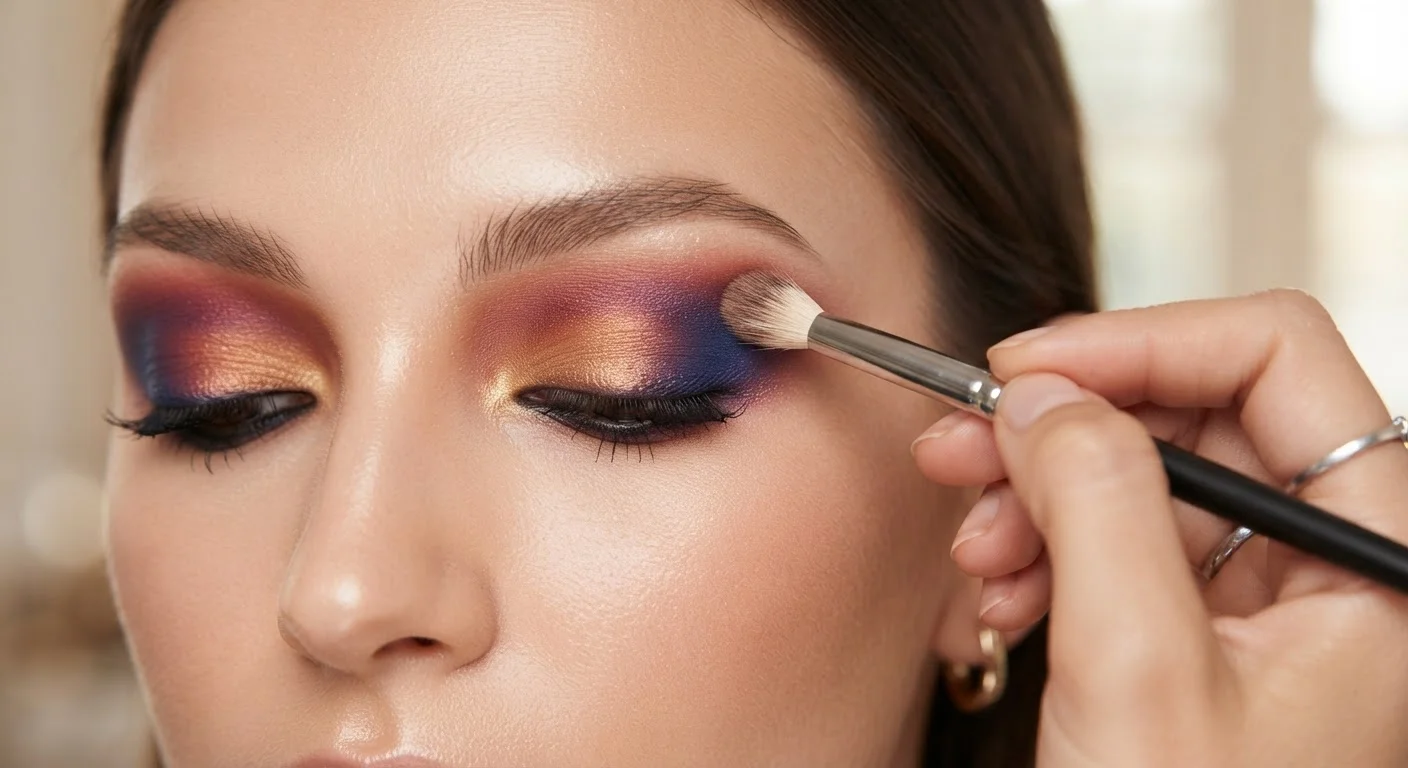
Why Blending Is the Real Skill
Most people learning eye makeup focus on color selection, but the quality of any eye look — from a subtle everyday wash to a dramatic smoky eye — depends almost entirely on how well the shades transition into one another. Blending is what turns a collection of separate colors into a cohesive, dimensional effect.
The good news: blending is a technique, not a talent. It relies on the right tools, the right motions, and a layered application order that keeps you in control. Before you begin, it helps to have your base prep in place — a consistent skincare routine contributes to how smoothly products sit and blend on the skin. If you're still assembling your tools, a focused starter kit is all you need to practice effectively.
What you will need
Fluffy blending brush
Diffuses edges and transitions between shades without adding additional pigment.
Flat shader brush
Packs pigment onto the lid with precision before blending begins.
Pencil or detail brush
Places darker shadow precisely in the outer corner or lower lash line.
Eyeshadow primer or concealer
Creates a tacky base so shadow adheres better and lasts longer.
Setting powder
Dusted lightly under the eye before shadow application to catch fallout for easy cleanup.
Understanding Brush Motion and Pressure
The two most common blending motions are the windshield-wiper (a horizontal back-and-forth sweep used to deposit and soften color in the crease) and the circular buff (small, light circles used to erase hard edges between shades). Neither motion should involve heavy pressure — the brush does the work, not your hand.
Pressure affects intensity. Pressing firmly packs pigment; a featherlight touch diffuses it. Use firm pressure with your shader brush when placing color, and switch to the lightest possible touch with your fluffy brush when blending. This distinction alone resolves most beginner frustration.
Clean Brushes Blend Better
A brush carrying leftover pigment will muddy your colors instead of softening them. Wipe your blending brush on a clean tissue between each step, or keep a dedicated second brush just for diffusing. Washing brushes weekly with a gentle cleanser maintains their softness and performance over time.
Step-by-Step: Building a Blended Eye Look
Follow these steps in order. Each one sets up the next, so skipping ahead tends to make later blending harder rather than faster.
Fallout Can Ruin Your Base
Eyeshadow fallout — stray pigment that drops onto the under-eye area — can undo a careful foundation application. Dust a light layer of loose setting powder under your eyes before you start, then brush it away once you've finished your eye makeup. This simple step keeps your base clean without extra effort.
Prep the lid with primer
Apply a thin, even layer of eyeshadow primer or a small amount of concealer across the entire eyelid up to the brow bone. Pat it in gently with your ring finger until it's smooth and nearly invisible. This step neutralizes any discoloration and creates a slightly tacky surface that grips pigment, preventing creasing and helping colors appear more vibrant.
Dust a transition shade into the crease
Load a small amount of your mid-tone or transition shade — typically a matte, neutral brown — onto your fluffy blending brush. Tap off the excess to avoid overloading. Apply the color just above the crease line using a back-and-forth windshield-wiper motion. This shade acts as a built-in gradient, making every color you place afterward look naturally blended from the start.
Apply the main lid color
Switch to your flat shader brush and load it with your chosen lid shade. Press the color onto the center and inner portion of the lid using gentle patting motions — avoid dragging the brush, which can disturb the transition shade. Pressing packs pigment efficiently and gives you stronger color payoff than sweeping.
Deepen the outer corner
Using a pencil brush or the corner of your shader brush, place a slightly darker shade into the outer third of the lid and the outer corner of the crease. This creates depth and dimension. Keep the application small and concentrated at first — you can always add more.
Blend all edges with a clean fluffy brush
Use a clean fluffy blending brush — free of any loaded pigment — and work in small circular motions where each color meets the next. The goal is to eliminate any hard lines while keeping each shade's general zone intact. Move upward and outward into the transition shade, softening as you go. Spend at least 60 seconds on this step; rushing is the most common cause of patchy results.
Add a highlight and finish
With a small flat brush or your fingertip, press a light shimmer or matte highlight shade onto the inner corner of the eye and directly under the brow bone. These placements create the illusion of lift and openness. Finally, do a quick check in a well-lit mirror — if any edges still look harsh, return to your fluffy brush for a few more passes. For a final review of your overall look before heading out, see our pre-departure makeup check-in guide.
Troubleshooting Common Blending Problems
Even with the right technique, issues come up. Here's how to address the most frequent ones:
- Colors look muddy: This usually means too many shades were combined with a loaded brush. Simplify to two or three shades and clean your brush between each color.
- Hard lines won't soften: The shadow may have set into the primer. Dust a tiny amount of the transition shade over the edge and blend immediately before it grips.
- Eyeshadow disappears on oily lids: A quality primer is essential here. Lid oiliness is often connected to overall skin type — understanding your skin type can inform which primer formulas tend to hold up best for you.
- Fallout under the eye: Use the setting powder under-eye trick described in the important callout above, or do your eye makeup before your base so any fallout can be cleaned up without consequence.
Too Much Product Is the Main Culprit
Overloading any brush makes blending nearly impossible and leads to the muddy, flat result most beginners want to avoid. Always tap off excess product before touching the brush to your lid. If colors have already muddied, dusting a little translucent setting powder over the area and then buffing with a clean brush can help restore definition.